Introduction to Ceramic Tiles
Ceramic tiles have been around for centuries and have evolved into a staple for both residential and commercial spaces. Whether it’s used as flooring, wall coverings, or even decorative pieces, ceramic tiles are not only durable but also come in various designs and finishes. This guide will take you through everything you need to know about ceramic tiles, their types, installation methods, and why they are a great choice for your home or business.
What Are Ceramic Tiles?
Ceramic tiles are made from a combination of clay, minerals, and water. These materials are fired in a kiln at high temperatures, which gives the tiles their hardness and durability. Ceramic tiles can be made from different types of clay, including porcelain and stoneware, and can be used in a variety of settings. They can be glazed for extra protection or left unglazed for a more natural look.
Types of Ceramic Tiles
Ceramic tiles come in several varieties, each with its own unique properties. Understanding the different types can help you choose the right tile for your needs.
Porcelain Tiles
Porcelain tiles are a type of ceramic tile made from finer clay and fired at higher temperatures. They are known for being denser and more durable than regular ceramic tiles, making them an excellent choice for high-traffic areas and even outdoor spaces.
Glazed Tiles
Glazed tiles are ceramic tiles that have a layer of liquid glass applied to their surface. This glaze not only makes the tiles more resistant to stains and scratches but also gives them a shiny finish. Glazed tiles are perfect for creating vibrant designs and are often used in bathrooms and kitchens.
Stoneware Tiles
Stoneware tiles are made from a mixture of clay and minerals that are fired at high temperatures. They are less porous than regular ceramic tiles and are known for their strength and durability. Stoneware tiles are often used in flooring because of their ability to withstand heavy wear and tear.
The Many Uses of Ceramic Tiles
Ceramic tiles are incredibly versatile and can be used in many different areas of your home. Let’s explore some of the most popular applications for ceramic tiles.
Flooring
One of the most common uses for ceramic tiles is flooring. Whether you choose porcelain, glazed, or stoneware tiles, ceramic tiles are durable, easy to clean, and available in a wide range of colors and designs. They can be used in virtually every room of the house, from the Bathroom Tile to the kitchen and even living rooms.
Wall Coverings
Ceramic tiles are also ideal for wall coverings. They are often used in bathrooms, kitchens, and entryways because they are waterproof and easy to maintain. Tiles are available in different shapes, sizes, and colors, so you can create a unique look on your walls.
Backsplash
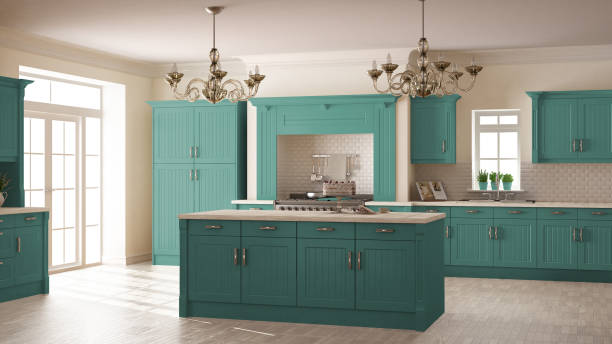
In kitchens, a Backsplash Kitchen Tiles is essential to protect your walls from spills and stains. Ceramic tiles are a popular choice for backsplashes due to their ability to resist moisture and stains. They also come in endless design options, from simple tiles to intricate mosaics.
Mosaic Tiles
Mosaic tiles are small pieces of ceramic tile arranged to create a pattern or image. They are often used for decorative purposes in both flooring and wall installations. Mosaics can be made from different tile types, such as porcelain or glazed tiles, Dal Tile and are perfect for creating personalized designs.
Benefits of Ceramic Tiles
Ceramic tiles come with a wide array of benefits, which is why they are so widely used. Let’s dive into some of the top advantages.
Durability
Ceramic tiles are known for their durability. Once installed, they can last for many years without showing signs of wear. This makes them an ideal choice for high-traffic areas and spaces that experience heavy use.
Waterproof Properties
Ceramic tiles, especially glazed and vitrified tiles, are resistant to water and moisture. This makes them perfect for bathrooms, Kitchen Tiles, and even outdoor areas where water exposure is common.
Easy Maintenance
Unlike other flooring materials, ceramic tiles are easy to clean and maintain. They don’t absorb stains and require only a quick wipe-down to look as good as new. If grout lines are properly sealed, ceramic tiles can maintain their appearance for many years.
Aesthetic Appeal
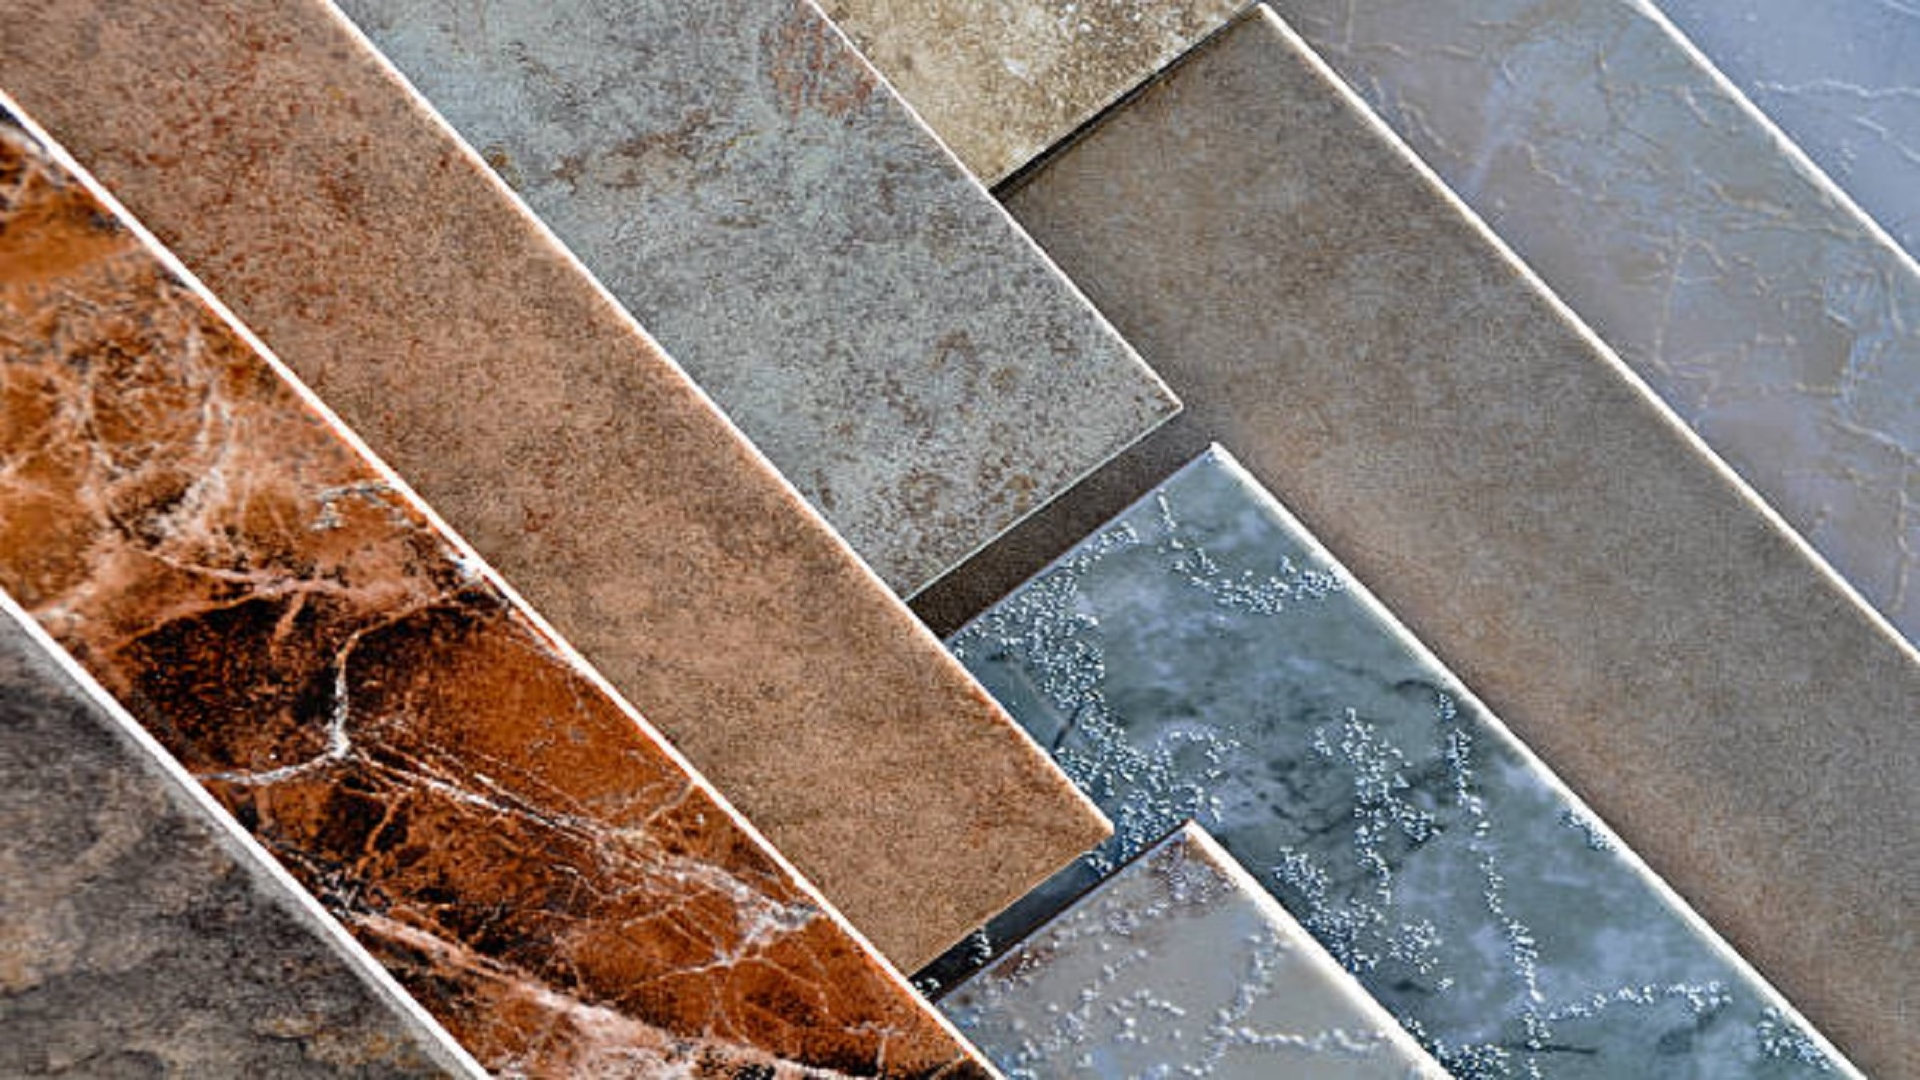
With their wide variety of designs, colors, and textures, ceramic tiles can add a touch of elegance and sophistication to any space. Whether you’re going for a modern, sleek look or something more traditional, ceramic tiles can help you achieve the style you desire.
Environmentally Friendly
Ceramic tiles are made from natural materials, which makes them a sustainable and eco-friendly option for your Home Tiles. Additionally, many ceramic tiles are recyclable, reducing their environmental impact.
The Tile Installation Process
Now that you know about the benefits of ceramic tiles, let’s dive into the process of installing them. While tile installation can be done by a professional, many DIY enthusiasts choose to install their own tiles with the right tools and a little patience.
Preparing the Surface
Before installing tiles, the surface must be clean, dry, and smooth. Any old flooring or paint should be removed to ensure proper adhesion of the tiles. Make sure the surface is level; if necessary, use a leveling compound to smooth out any bumps.
Laying the Tiles
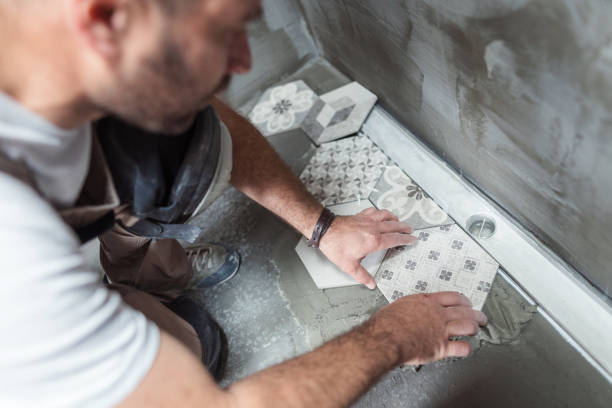
Start by laying down a thin layer of adhesive or thin-set mortar on the surface using a notched trowel. Begin placing the tiles from the center of the room and work your way toward the edges. Be sure to leave a small gap between the tiles to accommodate the grout later on.
Cutting Tiles
You may need to cut tiles to fit around edges, corners, or obstacles like pipes or doorways. A tile cutter or wet saw can help make precise cuts. Be sure to wear protective gear when cutting tiles, as they can break into sharp pieces.
Grouting the Tiles
Once the tiles are set and the adhesive has dried, the next step is grouting. Use a rubber float to spread the grout into the spaces between the tiles. Wipe off excess grout with a damp sponge and allow it to dry completely before using the space.
Choosing the Right Tile for Your Home
Selecting the right ceramic tile for your space depends on a variety of factors, including your budget, the area’s function, and your aesthetic preferences.
Size and Shape
Ceramic tiles come in many sizes and shapes, from traditional square tiles to large rectangular planks and intricate mosaic patterns. Choose a size that complements the proportions of your room. Larger tiles can make a small room feel bigger, while smaller tiles can create detailed, decorative patterns.
Color and Finish
Ceramic tiles come in a rainbow of colors, from neutral tones to vibrant shades. The finish of the tile also plays a role in the overall look. Glossy glazed tiles are great for adding shine, while matte finishes offer a more subtle appearance. Consider the room’s lighting and surrounding decor when selecting your tile’s color and finish.
Durability and Texture
For high-traffic areas like entryways or kitchens, choose durable tiles like porcelain or vitrified tiles. These materials are highly resistant to wear and tear. Additionally, consider the texture of the tiles; textured tiles are slip-resistant and can be a great choice for bathrooms or outdoor spaces.
Understanding Tile Grout
Tile Grout is the material used to fill the spaces between tiles. It helps hold the tiles in place and prevents moisture from seeping through the gaps. There are different types of grout to choose from, including sanded and unsanded varieties, each with its own unique properties.
Sanded Grout
Sanded grout is typically used for larger gaps between tiles, usually greater than 1/8 inch. It contains fine sand particles that give it strength and help prevent cracking over time.
Unsanded Grout
Unsanded grout is ideal for narrower gaps, typically less than 1/8 inch. It has a smooth texture and is easier to work with for smaller grout lines.
Vitrified Tiles: The Ultimate in Durability
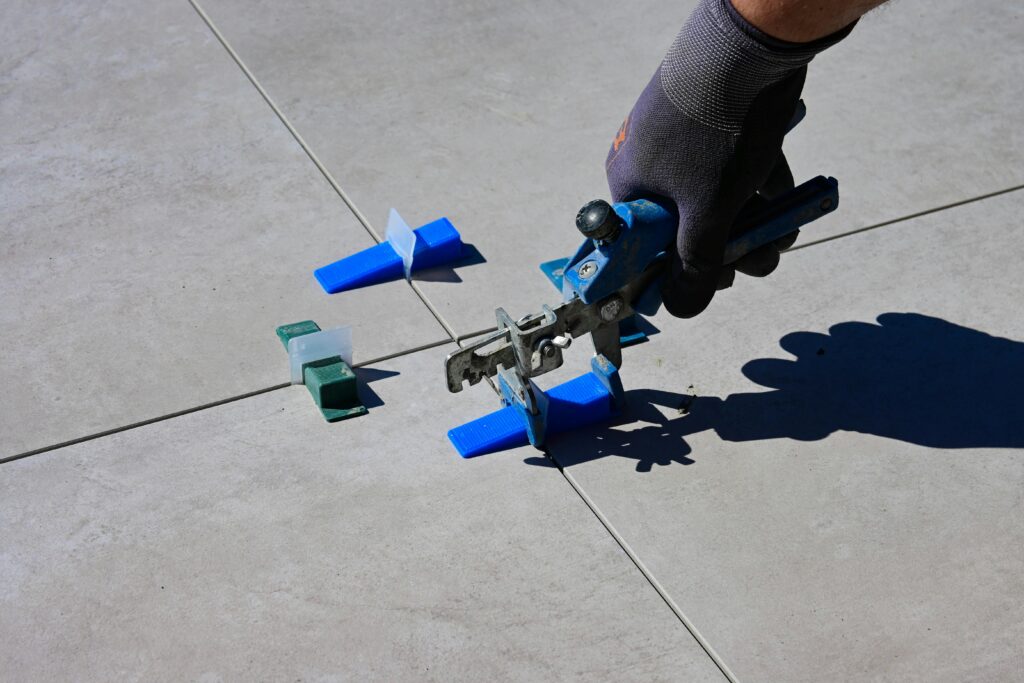
Vitrified tiles are a type of ceramic tile that is highly durable and non-porous. They are made by adding silica and other materials during the firing process, which results in a tile that is resistant to stains, water, and scratches. Vitrified tiles are commonly used in commercial spaces and areas where heavy foot traffic is expected.
Waterproof Tiles: Protecting Your Home from Moisture
Waterproof tiles are perfect for spaces that are exposed to moisture, such as bathrooms, kitchens, and laundry rooms. These tiles, particularly glazed and vitrified ones, prevent water from soaking into the surface, which helps to keep your space dry and clean. Waterproof tiles are also easier to maintain, as they resist mold and mildew growth.

Caring for Your Ceramic Tiles
To ensure that your ceramic tiles last for many years, proper care and maintenance are essential. Regular cleaning with mild detergent and a soft cloth can help keep your tiles looking fresh. Additionally, sealing the grout lines can prevent dirt and moisture from accumulating and causing damage.
The Future of Ceramic Tiles
As technology advances, so do ceramic tiles. New innovations, such as 3D printing and eco-friendly production methods, are paving the way for even more unique and sustainable tile designs. Whether you’re looking for a modern twist on traditional tiles or cutting-edge, futuristic styles, ceramic tiles will continue to play a significant role in interior design.
Common Ceramic Tile Mistakes to Avoid
When installing ceramic tiles, even the smallest mistake can lead to big problems later. To help you avoid costly errors, here are some of the most common mistakes people make when working with ceramic tiles:
1. Skipping Surface Preparation
Not properly preparing the surface before installation is a mistake many DIYers make. If the surface isn’t smooth, dry, and level, the adhesive may not stick well, leading to tiles that shift or break over time. Always take the time to clean and level the surface before starting.
2. Incorrect Grout Application
Grouting may seem like an easy task, but improper grout application can lead to uneven lines, excess grout buildup, or even tiles that pop out. Be sure to spread the grout evenly and remove any excess as you go along. If grout is left to dry on the surface of the tiles, it can be difficult to clean off later.
3. Not Leaving Enough Space for Expansion
Tiles expand and contract due to temperature and humidity changes. If you don’t leave enough space along the edges for expansion, the tiles can crack or shift. Always leave a small gap between the tiles and walls or corners to allow for this natural expansion.
4. Choosing the Wrong Adhesive
Different types of tiles require different types of adhesives. For example, porcelain tiles often require a stronger adhesive due to their dense nature, while ceramic tiles might work well with standard tile adhesives. Choosing the wrong adhesive can lead to tiles that don’t stick properly.
How to Maintain the Shine of Your Glazed Tiles
Glazed ceramic tiles are known for their shiny, smooth finish. Over time, however, this shine can dull from dust, grime, and everyday use. Here’s how to keep your glazed tiles looking glossy and fresh:
Regular Cleaning
Use a soft cloth or microfiber mop to clean your glazed tiles regularly. Avoid using harsh abrasives that could scratch the surface. A mild detergent mixed with warm water is perfect for most types of glazed ceramic tiles.
Deep Cleaning
For stubborn stains, use a mixture of baking soda and water. Apply the paste to the stained area and gently scrub with a soft brush. Be sure to rinse the area with water afterward to remove any residue.
Avoiding Harsh Chemicals
Some cleaning products contain harsh chemicals that can dull the shine of your tiles. Always choose pH-balanced cleaners and avoid bleach-based products that could harm the glaze.
The Art of Creating Mosaic Tile Designs
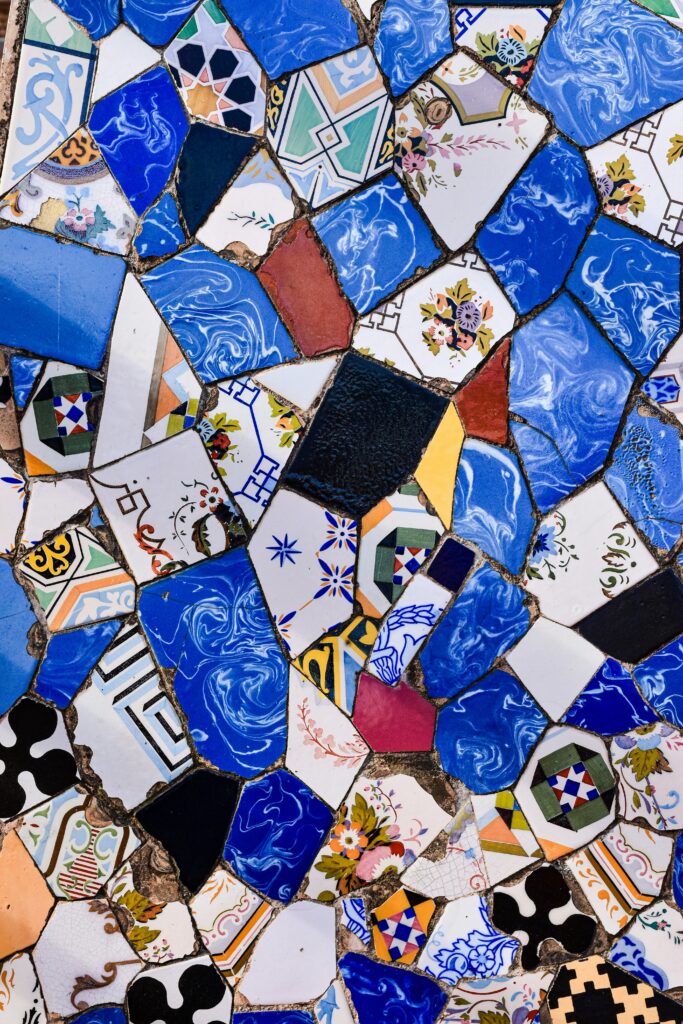
Mosaic tiles are a creative way to make a bold statement in any space. Whether you’re designing a custom backsplash or a decorative floor, mosaics allow you to express your artistic side. Here’s how you can create your own stunning mosaic designs:
Choosing the Right Tile Size
Mosaic tiles come in various sizes, from tiny 1×1-inch squares to larger, intricate shapes. When designing a mosaic, choose smaller tiles to create detailed patterns or images. Larger tiles are better suited for simpler, geometric designs.
Planning Your Design
Before you begin laying the tiles, sketch your design on paper or use a computer program to create a template. This helps you visualize how the final project will look and allows you to make adjustments before starting.
Grouting and Finishing
Once the tiles are laid and the adhesive has set, carefully grout the gaps between the tiles. The grout should match the design, so choose a color that complements the mosaic. Make sure to clean off excess grout quickly to avoid staining.
The Difference Between Porcelain and Ceramic Tiles
Although porcelain and ceramic tiles are both made from clay, they have some key differences. Knowing these distinctions will help you choose the best option for your project.
Porcelain Tiles
Porcelain tiles are denser and less porous than regular ceramic tiles. This makes them more durable and resistant to water, stains, and scratches. They are often used in high-traffic areas, bathrooms, and outdoor spaces.
Ceramic Tiles
Ceramic tiles are generally more affordable and easier to cut than porcelain tiles. They are more suited for indoor applications and work well in kitchens, living rooms, and bathrooms. While they are still durable, they are not as strong as porcelain tiles and can absorb more water.
Which to Choose?
If you’re looking for a budget-friendly option for indoor areas, ceramic tiles are a great choice. However, if you need something more durable for high-traffic areas or outdoor spaces, porcelain tiles are the better option.
How to Choose the Right Grout Color
Grout color can drastically change the look of your tile installation. Choosing the right color is essential for achieving the desired look in your space. Here’s how to pick the perfect grout color:
Matching Grout to Tile
If you want the tiles to stand out, choose a grout color that contrasts with the tile. For example, dark grout pairs well with light-colored tiles, creating a bold, defined look. On the other hand, using a grout color similar to the tiles helps create a more seamless, uniform appearance.
Neutral Grout Colors
For a timeless and versatile look, neutral grout colors like gray, beige, or white work well with a wide variety of tiles. Neutral grout is perfect for spaces where you want the tiles to be the focal point, rather than the grout.
Bold Grout Colors
If you want to make a statement, experiment with bold grout colors like black, blue, or even red. Bold grout colors work especially well with colorful or patterned tiles, as they can enhance the overall design.
Trends in Ceramic Tile Designs
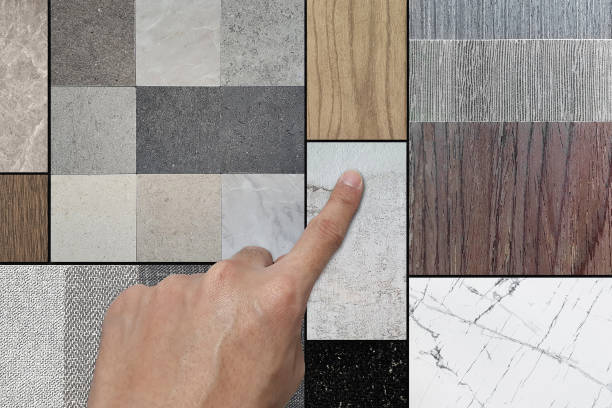
Tile trends evolve just like any other aspect of interior design. Whether you’re renovating or building from scratch, staying up to date on tile trends can help you create a modern and stylish space.
Textured Tiles
Textured ceramic tiles add depth and interest to any room. From ribbed tiles to tiles with raised patterns, textured tiles can create a unique, tactile surface that looks both modern and stylish.
Large-Format Tiles
Large-format tiles are becoming increasingly popular in modern design. These tiles are available in sizes up to 24 inches by 24 inches and can create a sleek, minimalist look. Large tiles also reduce the number of grout lines, making maintenance easier.
Bold Colors and Patterns
Bold, vibrant colors and geometric patterns are making a comeback in tile design. If you want to make a bold statement in your bathroom or kitchen, consider using bright colors or a mix of patterned tiles to create a unique design.
Troubleshooting Tile Problems
Tiles, like any other material, can face issues over time. Here are some common tile problems and how to troubleshoot them:
Cracked Tiles
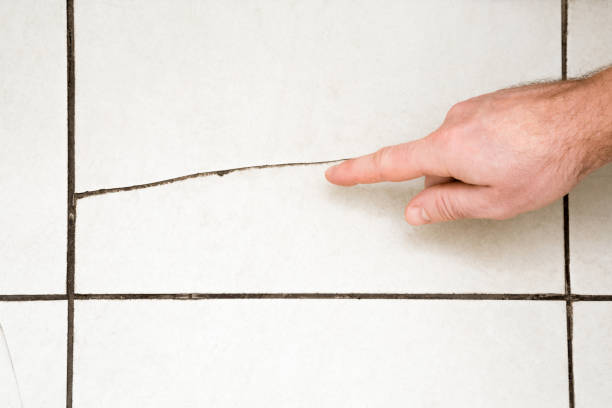
Cracked tiles can occur due to heavy impact or improper installation. If you find a cracked tile, it’s best to replace it immediately to prevent water from seeping into the subfloor. Replacing individual tiles is a simple process that doesn’t require removing the entire floor.
Loose Tiles
If a tile becomes loose, it may be due to weak adhesive or shifting subflooring. Reapply adhesive under the tile and press it down firmly to secure it. If the subfloor is the issue, it may need to be repaired before the tile can be reinstalled.
Discolored Grout
Grout discoloration is a common problem, especially in high-moisture areas. Clean grout with a mixture of vinegar and water to remove stains. If discoloration persists, consider applying a grout sealer to prevent future staining.
The Environmental Benefits of Ceramic Tiles
As the world becomes more conscious of sustainability, many people are looking for eco-friendly alternatives in their home design. Ceramic tiles, especially those made from natural materials, offer several environmental benefits that make them a sustainable choice.
1. Natural Materials
Ceramic tiles are made from clay, sand, and natural minerals, which are abundant and renewable resources. These materials require less energy to produce compared to other flooring options, making ceramic tiles a more eco-friendly choice.
2. Longevity and Durability
The long lifespan of ceramic tiles contributes to sustainability. Because they are durable and require minimal maintenance, they don’t need to be replaced as often as other flooring options, reducing waste. With proper care, ceramic tiles can last for decades.
3. Recyclability
At the end of their life, ceramic tiles can be recycled, which reduces the environmental impact. Many manufacturers are now incorporating recycled materials into their production processes, further decreasing the overall carbon footprint of ceramic tiles.
4. Energy-Efficient Manufacturing
The production of ceramic tiles has become more energy-efficient over the years. With modern kilns and techniques, manufacturers are reducing their energy consumption, which further reduces the environmental impact of ceramic tile production.
How to Remove and Replace Damaged Ceramic Tiles
Over time, even the most well-installed tiles can get damaged ceramic tiles. Whether it’s due to heavy impact, wear and tear, or moisture damage, here’s a step-by-step guide on how to safely remove and replace damaged ceramic tiles.
Tools You’ll Need
- Hammer
- Chisel
- Tile adhesive or mortar
- New tile (same type and size)
- Grout
- Grout float
- Utility knife
- Sponge and water
Removing the Damaged Tile
Start by using a utility knife to score the grout around the damaged tile. Then, carefully tap a chisel under the tile and use the hammer to gently lift it up. Once the tile is loose, remove it completely. Be cautious to avoid damaging surrounding tiles.
Cleaning the Area
After the old tile is removed, clean the surface thoroughly. Scrape away any remaining adhesive or mortar from the subfloor. If there is any debris or dust, sweep it away before applying the new adhesive.
Installing the New Tile
Apply a layer of adhesive to the back of the new tile and press it firmly into place. Make sure it’s aligned with the surrounding tiles. Use spacers to ensure even gaps between the tiles for grout.
Grouting
Once the adhesive has dried, use a grout float to spread grout over the joints. Be sure to wipe away any excess grout with a damp sponge to avoid staining the surface. Allow the grout to dry for 24 hours before using the area.
How to Make Your Tiles Slip-Resistant
While ceramic tiles are beautiful, they can sometimes be slippery, especially in wet areas like bathrooms and kitchens. Fortunately, there are several ways to make your ceramic tiles slip-resistant.
1. Choose Textured Tiles
Textured ceramic tiles have a rough surface that naturally provides more grip. They are a great option for high-moisture areas like bathrooms, pools, or entryways where slippery floors are a concern.
2. Apply Anti-Slip Coatings
Anti-slip coatings are available in stores and can be applied to the surface of ceramic tiles to make them less slippery. These coatings create a textured finish that increases traction, reducing the risk of falls.
3. Use Slip-Resistant Rugs or Mats
In high-traffic or wet areas, using slip-resistant rugs or mats can help reduce the risk of slipping. These can be placed over your tiles in areas like bathroom entrances or in front of the kitchen sink.
4. Keep Tiles Clean
Regularly cleaning your tiles will prevent slippery residues from building up. Use a mop with a mild cleaning solution and avoid leaving soap or detergent on the tiles, as they can create a slippery surface.
DIY vs. Professional Ceramic Tile Installation
Installing ceramic tiles can be a satisfying DIY project, but it’s important to know when to tackle it yourself and when to call in the professionals. Let’s explore the pros and cons of DIY and professional tile installation.
DIY Installation
- Pros:
- Cost Savings: Installing tiles yourself can save you money on labor costs.
- Personal Satisfaction: There’s a sense of accomplishment in completing your own Home Depot Flooring project.
- Full Control: You can choose your own materials and take your time with the project.
- Cons:
- Time-Consuming: Tile installation is a detailed process and can take longer if you are inexperienced.
- Risk of Mistakes: Incorrect installation can lead to costly repairs or replacements.
- Requires Special Tools: Cutting tiles and mixing mortar may require specific tools that not everyone has on hand.
Professional Installation
- Pros:
- Expertise: Professional tile installers have the skills and experience to get the job done efficiently.
- Quality Results: A professional installation ensures that your tiles are placed correctly, with even grout lines and minimal errors.
- Warranty: Many professional installers offer warranties for their work, giving you peace of mind.
- Cons:
- Higher Costs: Hiring a professional can increase the cost of your tile installation project.
- Less Personal Control: You may not have as much input in the finer details of the design process.
When to Choose DIY or Professional Help
If you’re experienced with DIY home improvement projects and have the tools necessary, installing ceramic tiles yourself could be a great option. However, if you’re unfamiliar with tile installation or want to ensure a perfect finish, hiring a professional may be the best route.
The Role of Tile Trim and Edging
Tile trim and edging are often overlooked, but they play a vital role in finishing the look of your tile installation. These small details can help create a polished, professional appearance.
1. What is Tile Trim?
Tile trim is a special type of molding that is applied to the edges of tiles, often in corners or around fixtures. Trim can help conceal rough edges and provide a clean, finished look. It’s available in various materials, such as metal, plastic, or ceramic, and can be matched to your tiles.
2. Types of Tile Edging
- Bullnose Edging: This is a rounded edge that is perfect for corners or exposed tile edges.
- Square Edging: Square or straight edging offers a more modern and sleek finish, ideal for minimalist designs.
- Beveled Edging: Beveled edges add a decorative touch and work well in transitional areas where two tile types meet.
3. How to Apply Tile Trim
Tile trim is applied in the same way as tiles, using adhesive and grout. Make sure to measure carefully and choose the right size of trim for the area. Trim can be applied along the edges of walls, floors, and around any windows or doors to create a seamless transition.
The Cost of Ceramic Tile Projects
The cost of ceramic tile projects can vary widely depending on factors such as the type of tile, the area being tiled, and whether you hire a professional. Understanding the costs involved is essential to staying within budget for your tile installation.
Tile Cost
Ceramic tiles come in a range of prices, depending on the quality, style, and size. On average, you can expect to pay between $1 and $10 per square foot for ceramic tiles, with higher-end tiles like porcelain and mosaics costing more.
Additional Costs
- Installation: If you hire a professional, expect to pay between $4 and $15 per square foot for labor, depending on your location.
- Tools and Supplies: If you decide to DIY, you’ll need to purchase tools such as a tile cutter, trowel, and grout float. These can add anywhere from $50 to $300 to your total cost, depending on what you already have on hand.
- Subfloor Preparation: If your current subfloor needs to be leveled or reinforced, this can add to the cost of installation.
Budgeting Tips
- Compare Prices: Shop around to find the best deals on tiles, grout, and adhesives.
- DIY vs. Professional: Decide if you’re comfortable installing the tiles yourself or if you need to hire a professional.
- Plan for Extras: Always buy a little extra tile to account for cuts and mistakes. Generally, it’s recommended to purchase 10% more than you need.
Author Remarks
Ceramic tiles are an incredibly versatile and long-lasting option for any home. Whether you’re updating your floors, adding a backsplash, or creating an artistic mosaic, ceramic tiles provide endless design possibilities. With proper installation, care, and maintenance, your ceramic tiles can enhance your home for years to come.
We hope this guide has provided you with all the information you need to make the right choice for your ceramic tile project. Whether you choose porcelain, glazed, or stoneware tiles, be sure to follow the tips and advice shared here to ensure a beautiful and durable result.


8 Comments